")
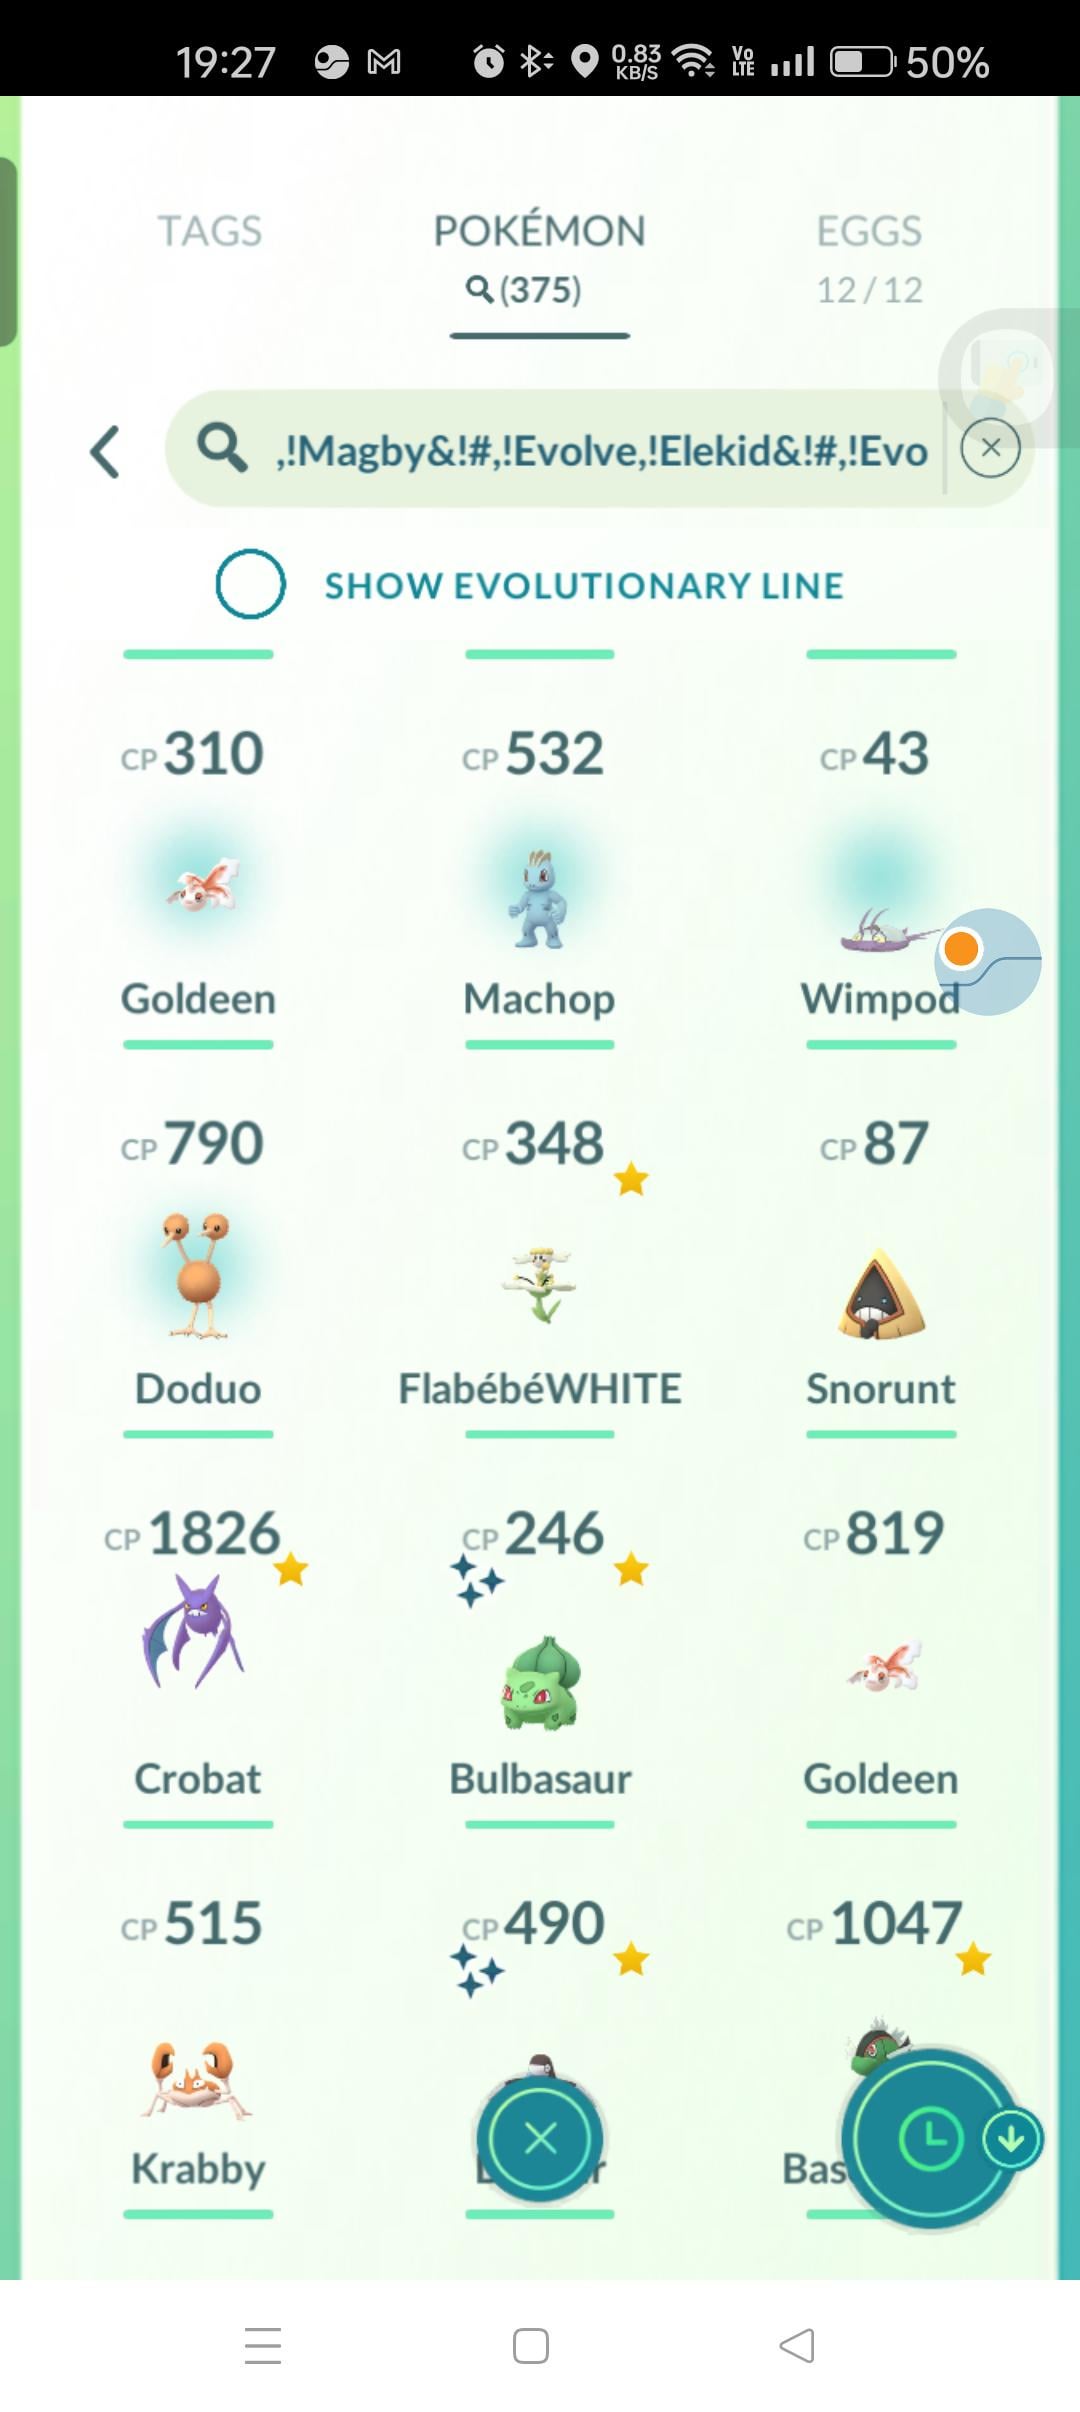
Okay, let’s talk about figuring out those search filters in Pokemon Go. Honestly, my Pokemon storage was getting ridiculous. Just scrolling and scrolling, trying to find that one specific critter I needed for a raid or maybe to trade. It was a real pain.
Sorting Out the Mess
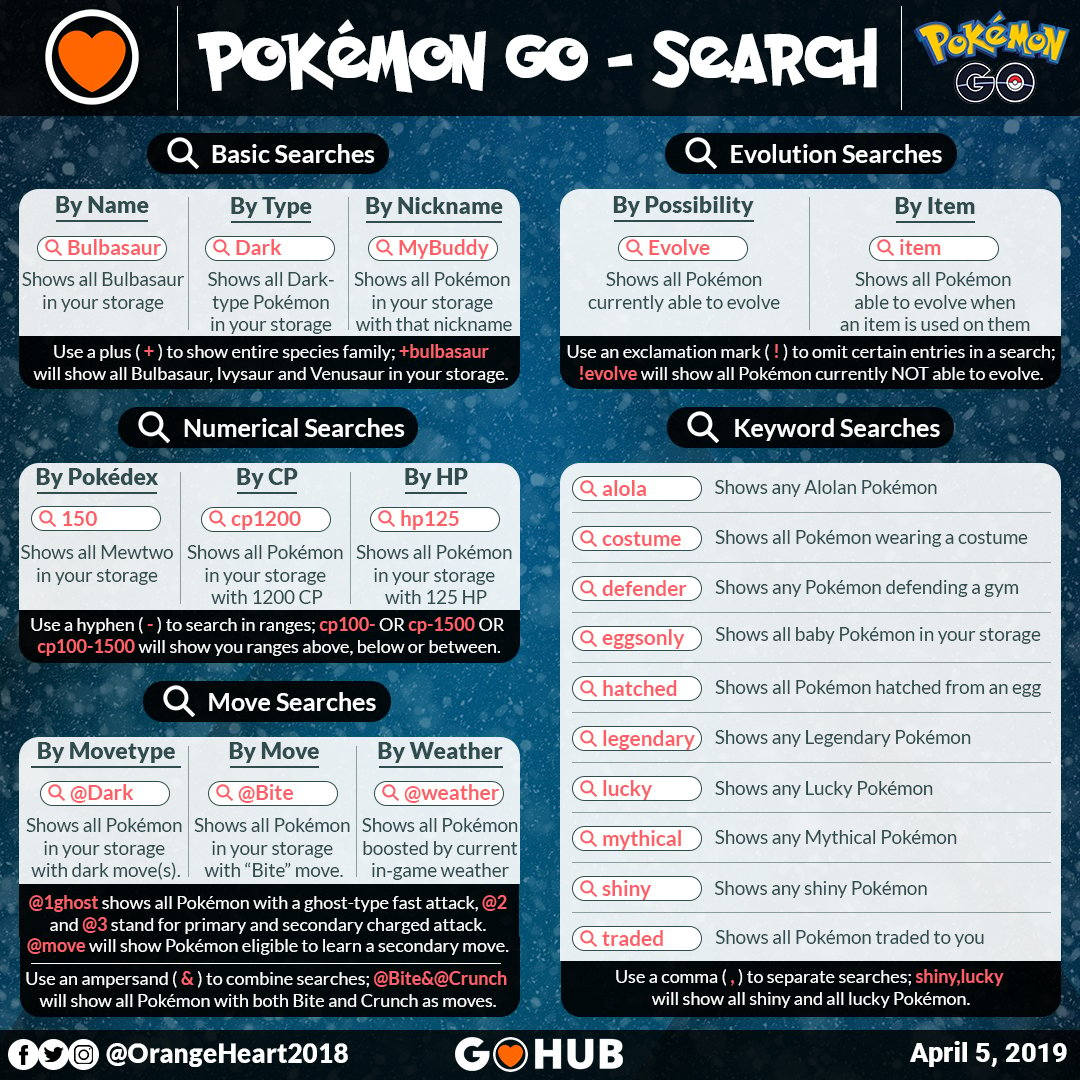
At first, I just typed in the Pokemon’s name, like everyone else. Simple enough. But then I started noticing that little search bar could do more. I think I first tried typing a number, wondering if it did anything. Didn’t seem to work right away. Then maybe I tried typing ‘shiny’ just on a whim? And boom, only the shiny ones showed up. That was kind of an “aha!” moment.
So I started messing around more seriously. I needed to clear out stuff, right? My bag was always full. I learned you could type things like:
0,1,2– To find the real low IV trash to transfer quickly.3,4– To see the good ones I definitely wanted to keep. Seeing4pop up only my perfects was super satisfying.legendaryormythical– Made finding my powerful guys way easier than scrolling forever.shadoworpurified– Helped when I was specifically looking for those types for battles or tasks.
Getting Fancy With It
Then I figured out you could combine things. This was the real game changer. I learned that using a comma or an ampersand meant “AND”. So, if I wanted to find, say, all my high-IV Machop, I could type machop&3. Suddenly, I wasn’t just finding things, I was filtering for exactly what I needed.
And the exclamation mark for “NOT”? So useful! Like, maybe I want to see all my Fighting types except Machamp. I could type fighting&!machamp. This helped a lot when preparing battle teams and wanting variety.
I also found stuff like @special to find Pokemon with legacy moves or moves learned via Elite TM. And @fighting would show me anything that knew a Fighting-type move, regardless of the Pokemon’s actual type. Super handy for checking attackers before a raid.
Other things I stumbled upon and use quite a bit:
age0– Shows only Pokemon caught today. Great for quickly checking the day’s catches.age1for yesterday, and so on.distance100-– Shows Pokemon caught at least 100km away. Essential for checking trade distance for candies or tasks.tradeevolve– To quickly find those guys who evolve when traded.lucky– Obvious, but good to have.
Making Life Easier
Honestly, digging into these filters made managing my collection so much less of a chore. Instead of endless scrolling and comparing, I can just type a quick code. Finding Pokemon to transfer, checking for good PvP candidates (like greatleague&!4 to find stuff under the CP cap but maybe not perfect IVs), or prepping for raids is way faster.
They even let you save searches now, which is brilliant. I have one saved for 0,1,!shiny,!legendary,!mythical,!4 which basically shows me most of my potential transfer candidates in one go. Saves me a ton of time every few days.
So yeah, if you’re not using the search filters much, give it a try. Just start typing stuff in that search bar. You’d be surprised what works. It really changed how I handle my Pokemon storage.


")


