Alright, buckle up folks, ’cause I’m gonna walk you through how I finally figured out where to slap that comm system onto my motorcycle helmet. It was a journey, lemme tell ya!
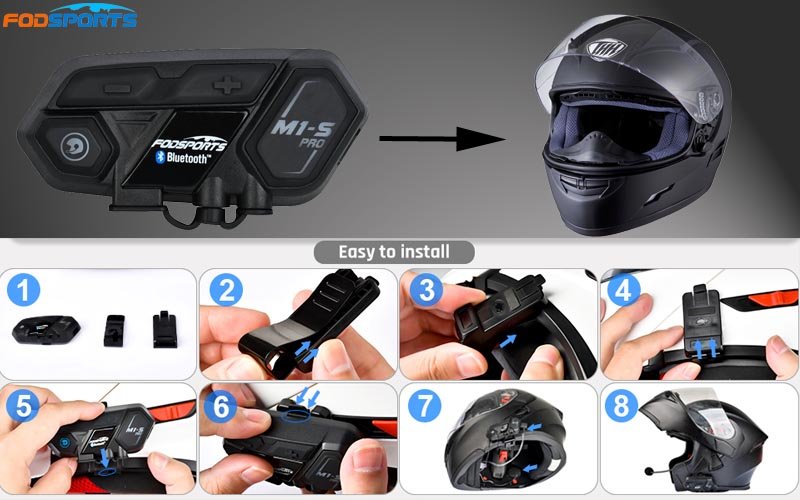
So, first things first, I unboxed this shiny new comm system I got. Looked at all the bits and pieces, felt a bit overwhelmed, you know? Instructions were… less than helpful. Pictures were tiny, words were vague. Classic.
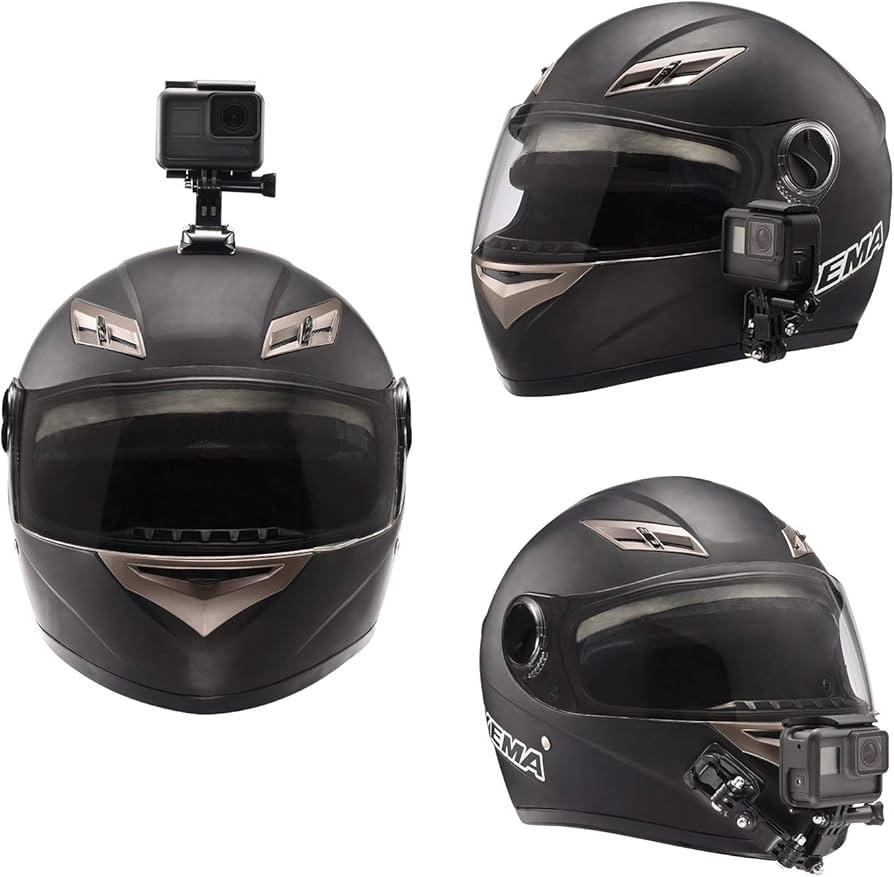
The initial struggle: Helmet shape! My helmet’s got some funky curves and vents all over the place. I tried holding the mounting plate (the sticky one) in a bunch of different spots. High, low, front, back… nothing seemed quite right. It was either blocking a vent, sitting crooked, or just looked plain goofy.
- First attempt: Too high. Looked like I had a weird antenna sticking out. Plus, wind noise was gonna be a nightmare up there.
- Second attempt: Too low. Kept bumping it with my shoulder when I turned my head. Not ideal!
- Third attempt: Tried to get it further back, but the curve of the helmet was way too aggressive. The sticky mount wouldn’t sit flush.
Then I thought, “Alright, time to get scientific.” I grabbed some masking tape (the blue kind, doesn’t leave residue!) and started taping the mount in different positions. Rode around the block a few times – slow, obviously! – to see how it felt. Did it catch the wind? Did it interfere with my vision? Could I easily reach the buttons?
After a lot of fiddling and a couple of embarrassing U-turns, I finally found a sweet spot. Key was finding a relatively flat area on the side of the helmet, just below the temple area. It was clear of vents, didn’t block my vision, and felt pretty secure.
Prepping the surface is KEY! I cleaned the helmet surface with some isopropyl alcohol (rubbing alcohol). You gotta get rid of all the dirt, grease, and bug guts. Let it dry completely.

Peel off the backing from the sticky mount. Take a deep breath! There’s no going back once it’s on. I lined it up carefully with my masking tape marks and pressed it firmly onto the helmet. Held it there for a good minute, applying even pressure.
Wait! Don’t rush! The instructions said to wait 24 hours for the adhesive to fully cure before attaching the actual comm unit. Patience is a virtue, people. I resisted the urge to play with it and left it overnight.
The next day, I clicked the comm unit onto the mount. It felt solid! Took another short ride to test it out. Wind noise was minimal, the buttons were easy to reach, and I could actually hear my music! Victory!
Final Thoughts:
- Take your time! Don’t just slap it on.
- Masking tape is your friend. Use it to experiment.
- Clean the helmet surface thoroughly.
- Be patient and let the adhesive cure properly.
Hope this helps you avoid some of the headaches I went through. Ride safe!