
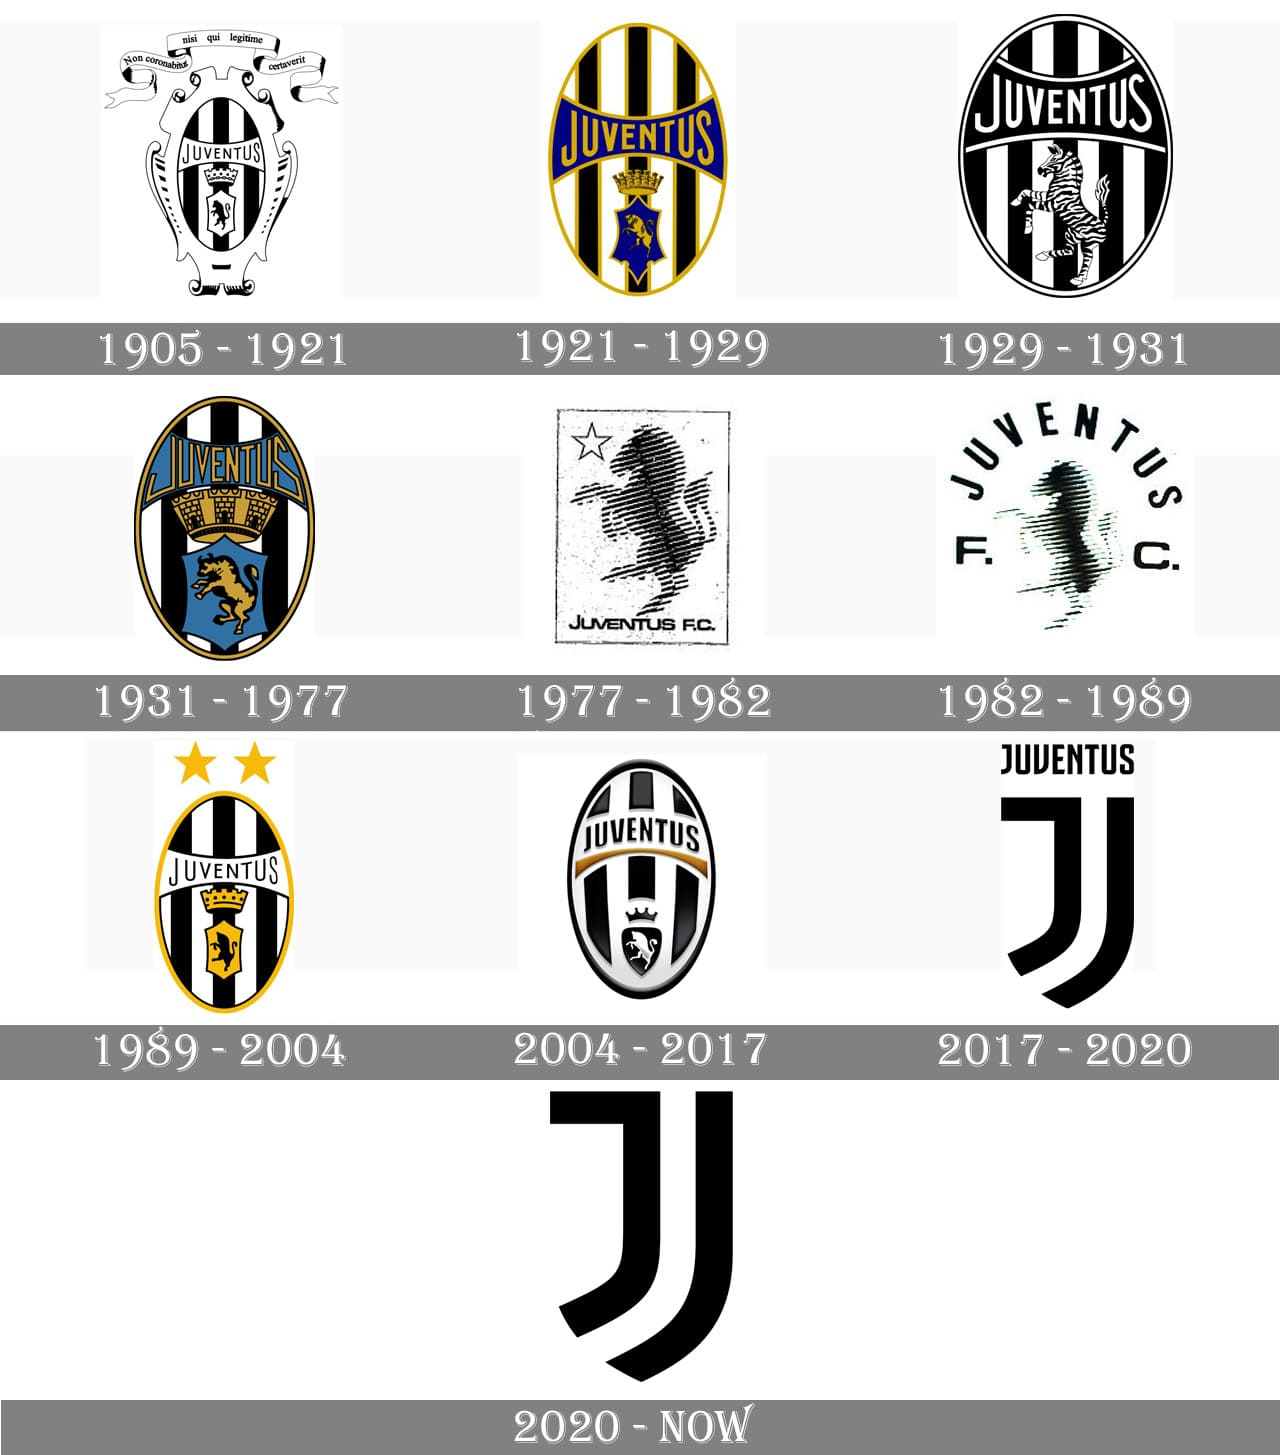
Alright, so today I’m gonna walk you through how I tackled recreating the Juventus FC crest. It was a fun little project, and I learned a bunch along the way, so buckle up!
First off, I grabbed a high-res image of the crest. You know, gotta have that reference material front and center. I threw it into my design software – I use [hypothetical software name], but whatever you’re comfortable with works.
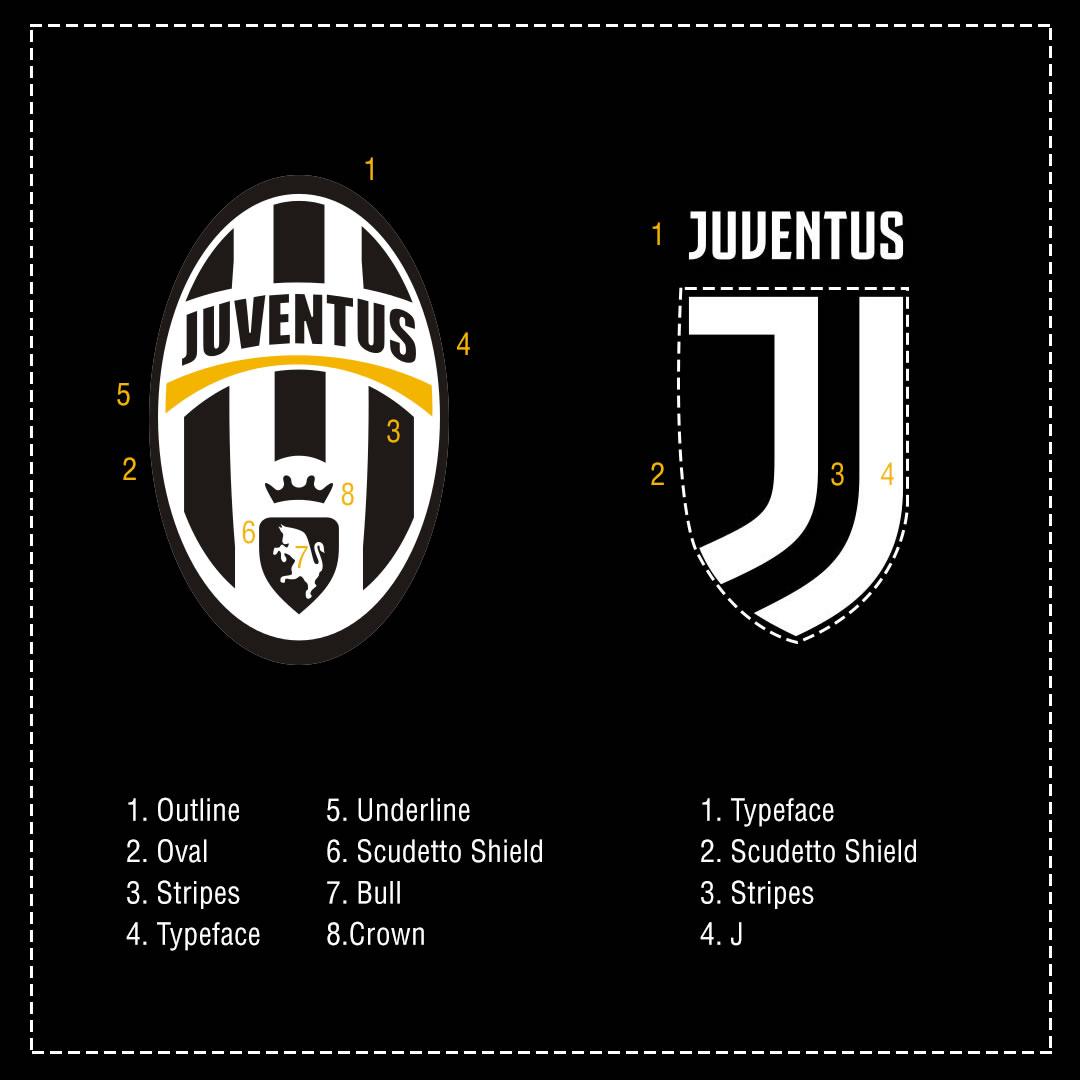
Next up was blocking out the basic shapes. The oval, the shield, the stripes – laid ’em all down with simple shapes. No fancy details yet, just making sure the proportions looked right. This is where I spent a good chunk of time, tweaking and adjusting until everything felt balanced. You really need to eyeball it to get it right.
Then came the fun part: adding the details. The iconic “J,” the stars, the little flourishes – I started with the “J” since it’s the most prominent element. I used the pen tool to trace the outline, and then filled it in. The stars were a bit easier, just basic shapes that I duplicated and positioned carefully.
The stripes were relatively straightforward, but getting the spacing and thickness consistent took some fiddling. I used guides to help me keep everything aligned. I also paid close attention to the colors, making sure they were a close match to the official Juventus colors. I used a color picker tool to sample the colors from the reference image.
Once I had all the elements in place, I started refining the details. I added some subtle gradients and shadows to give the crest a bit of depth. I also tweaked the shapes and curves to make them look smoother and more polished. This is where the small details really make a difference.
Finally, I exported the crest in a few different formats – you know, SVG, PNG, the whole shebang. And that was it! Recreating the Juventus FC crest was a fun and challenging project. It taught me a lot about attention to detail and the importance of getting the proportions right. I’m pretty happy with how it turned out. Hope this breakdown was helpful!


