
Alright, so you’ve been eyeing that gleaming chrome on custom bikes and thinking, “My ride needs some of that!” I’ve been there. Decided my old project bike, a real beater I picked up, deserved a bit of shine. Thought it would be straightforward. Ha! Let me walk you through what actually went down when I decided to get some motorcycle chrome plating done.
Getting Started: The Dream vs. Reality
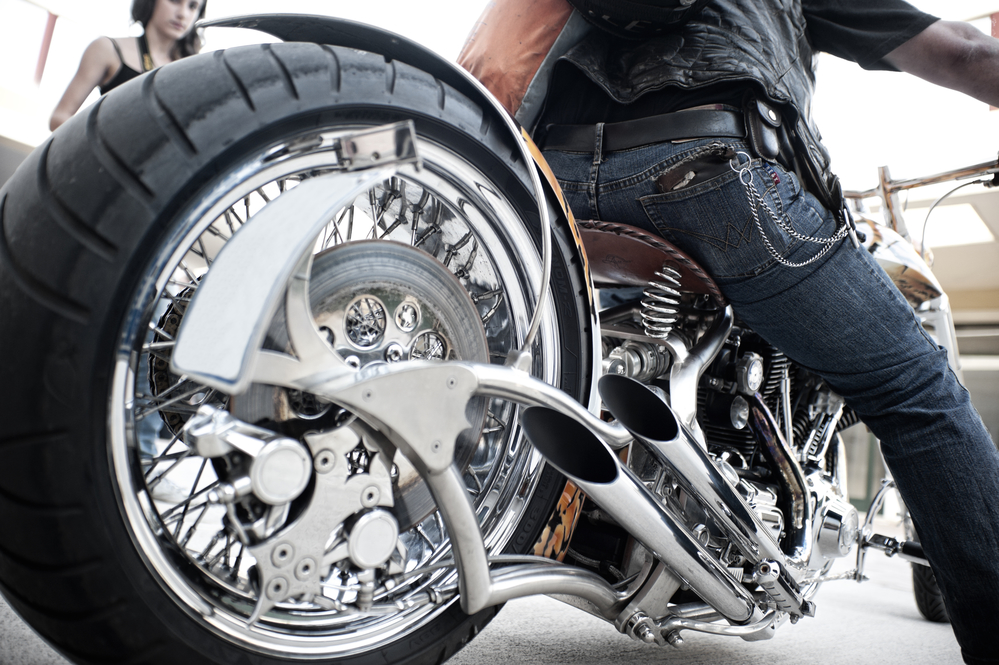
First off, I had this vision, you know? Shiny exhaust, gleaming handlebars, the works. I started by figuring out which parts I really wanted to chrome. For me, it was the exhaust pipes because they were looking seriously sad, the sissy bar, and a few smaller bits like the fender struts. Easy, right? Just take ’em off and send ’em out. That was my first mistake – underestimating the prep.
The Grind: Prepping the Parts
This is where the real work, the stuff nobody glamorous ever shows you, begins. You can’t just hand over dirty, rusty parts to a chrome plater. Well, you can, but they’ll either refuse it or charge you an arm and a leg for them to do the cleaning, and who knows if they’ll do it right for your standards.
So, I rolled up my sleeves. Here’s what I had to do:
- Disassembly: This was the easy part, just unbolting everything. Took a bunch of photos so I’d remember how it all went back together. Learned that lesson the hard way on a previous project.
- Stripping: My exhaust had some flaky old chrome and paint remnants. Man, stripping that off was a nightmare. Used chemical strippers, wire brushes, scrapers… It’s messy, stinky work. Make sure you’ve got good gloves and a mask.
- De-rusting and Cleaning: Every speck of rust, grease, and gunk had to go. I used degreasers, rust removers, and a whole lot of elbow grease. Some folks use electrolysis for rust, which is cool, but I went old school.
- Sanding and Polishing: This is the part that separates the okay chrome jobs from the amazing ones. The plater told me, “The smoother you give it to us, the better it’ll look.” And he wasn’t kidding. I spent hours, no, days, sanding. Started with rough grits to remove pitting and scratches, then worked my way up to super fine. Then polishing with compounds until the metal looked like a dull mirror even before plating. My fingers were raw, man. This is the stage where many people give up or cut corners. Don’t.
Honestly, the prep work probably took up 80% of my total effort. It’s tedious, it’s dirty, and you’ll question your sanity. But stick with it.
Finding a Plater and The Process
Once my parts were smoother than a baby’s bottom, it was time to find a chrome shop. This wasn’t as simple as a Google search. I asked around, talked to other bikers, looked for shops that specialized in motorcycle parts, not just industrial stuff. You want someone who understands the care needed for show-quality chrome. I found a local guy who’d been doing it for decades. He wasn’t cheap, but his work looked solid.

He walked me through what they do. It’s not just one layer of chrome. Good chrome plating is usually a three-step process: copper, then nickel, then chrome. The copper helps fill tiny imperfections and helps the nickel stick. The nickel gives it that deep shine and corrosion resistance. The chrome itself is a very thin, hard layer on top that gives it the blue-ish tint and further protection. Some cheap places might skip steps, so ask questions!
Then came the waiting. Good chrome work takes time. Don’t expect to get your parts back in a week, especially if the shop is busy. Mine took about four weeks. And yeah, it wasn’t cheap. Quality chrome costs money because it’s labor-intensive, and the chemicals and environmental compliance are expensive for the shops.
The Big Reveal and Reassembly
When I finally got the call to pick up my parts, I was like a kid at Christmas. And man, they looked incredible. That deep, liquid shine was exactly what I’d hoped for. All that prep work paid off. Holding those perfectly smooth, gleaming parts was something else.
Reassembly was a joy. Seeing those chromed pieces go back onto the bike, transforming it from a scruffy machine into something eye-catching, was super satisfying. Everything fit perfectly, which was a relief. Sometimes the plating can add a tiny bit of thickness, but my guy knew what he was doing.
The bike looked amazing. The chrome just popped. It completely changed the look and feel. Was it worth all the effort and cost? Absolutely. Every time I look at it, I remember the hours I put in, and it makes me appreciate it even more.

So, My Two Cents
If you’re thinking about chroming parts for your motorcycle, go for it. But know what you’re getting into. It’s not a quick fix. Be prepared for serious prep work if you want top-notch results. Don’t skimp on finding a reputable plater; good chrome isn’t cheap, and cheap chrome isn’t good.
It’s a process, a bit of an old-school craft, really. And when it’s done right, there’s nothing quite like it. My bike’s never looked better, and yeah, I’d probably do it again. Maybe. After my hands recover.


