
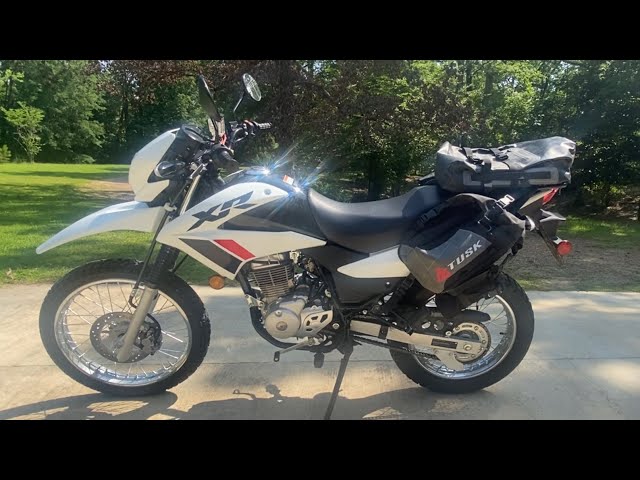
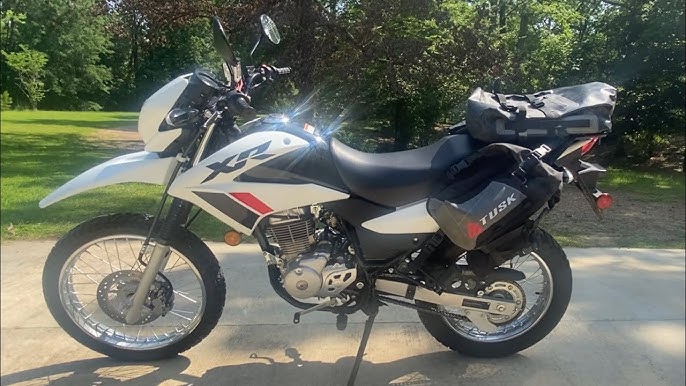
Alright, so today I’m gonna walk you through what I did to get a luggage rack slapped onto my Honda XR150L. It’s one of those things, you know? You get a bike, and then you realize you can’t even carry a loaf of bread home without a backpack. So, a rack it was.
Figuring Out What I Needed
First things first, I had to actually get a rack. Spent a bit of time looking around online, you see all sorts of them. Some look like they’d snap if you put a heavy coat on them, others look like they could carry a small car. I just wanted something sturdy enough for a duffel bag or maybe a small top box later on. Didn’t want to break the bank either. Found one that seemed like a decent compromise – looked solid, price wasn’t too crazy.
The Arrival and Unpacking Shenanigans
When the package finally showed up, I eagerly tore it open. You know that feeling, like a kid on Christmas morning, only it’s bike parts. The rack itself felt pretty solid, good welds from what I could tell. The hardware bag… well, it was a bag of bolts and some spacers. Instructions were, let’s say, “minimalist.” A single sheet with a diagram that looked like it was drawn by someone who’d only heard about motorcycles. Classic.
Getting Down to Business: The Installation
Okay, so the actual doing. I wheeled the XR150L into a spot where I had some decent light and space to work. First job was to locate the mounting points on the bike. On the XR150L, you’re looking at a couple of bolts under the seat and usually some points near the rear fender or grab handles if your model has ’em or if the rack replaces them. My model had some bolts holding the existing little plastic bits on the side.
So, I grabbed my trusty socket set. You’ll want a few common metric sizes. I think it was mostly 10mm and 12mm, maybe a 14mm for something.
I started by removing the seat. That usually just involves a key turn and a pull. Easy peasy. Then I undid the bolts that were holding on the factory bits where the rack was supposed to go. I always try to keep these bolts somewhere safe, like a magnetic tray, because you just know one will roll off into another dimension if you don’t.
Next, I offered up the rack to the bike. This is where you sometimes find out if things are actually going to line up. It took a bit of wiggling and gentle persuasion. One side seemed to go on okay, but the other side needed a little… encouragement. Nothing a bit of careful pushing couldn’t sort. It’s never a perfect fit first time, is it?
Once I had the holes roughly aligned, I started threading in the new bolts that came with the rack. I always do this by hand first. You don’t want to cross-thread anything, especially on your bike’s frame. That’s a headache you really don’t need. I put all the bolts in loosely at first. This gives you some wiggle room to get everything perfectly aligned before you tighten them down.
- Secured the forward mounting points under where the seat would go.
- Aligned and loosely bolted the rear support arms. Some racks have spacers, make sure you use them if they’re included. Mine did, and they were crucial for getting the clearance right.
- Once everything looked straight and felt solid, I tightened all the bolts. Not crazy tight, mind you. You don’t want to strip threads or crack anything. Just good and snug. “Firm” is the word I’d use.
The Final Check and Thoughts
After all the bolts were snugged up, I reattached the seat. Gave the rack a good shake. It felt pretty darn solid. Stood back, had a look. Yep, looked like it belonged there. Doesn’t look too out of place on the XR150L, which is good.
So there you have it. It wasn’t brain surgery, but like most things, it takes a bit of patience. The instructions could have been better, but a bit of common sense gets you through. The biggest thing is to take your time, don’t force anything, and keep track of your bits and pieces. Now I can actually carry stuff! Next up, finding a decent bag to strap to it.
Overall, a worthwhile little project. Makes the bike way more practical for daily stuff or even a small adventure. If you’re thinking about it, I’d say go for it. Just pick a decent quality rack and don’t rush the install.


