")
Grabbing Supplies
First I dumped my art stuff on the kitchen table – just a cheap sketchpad, that HB pencil I found under the sofa, and a crusty eraser. Honestly thought about using the kids’ crayons but nah, pencil’s better for mess-ups.
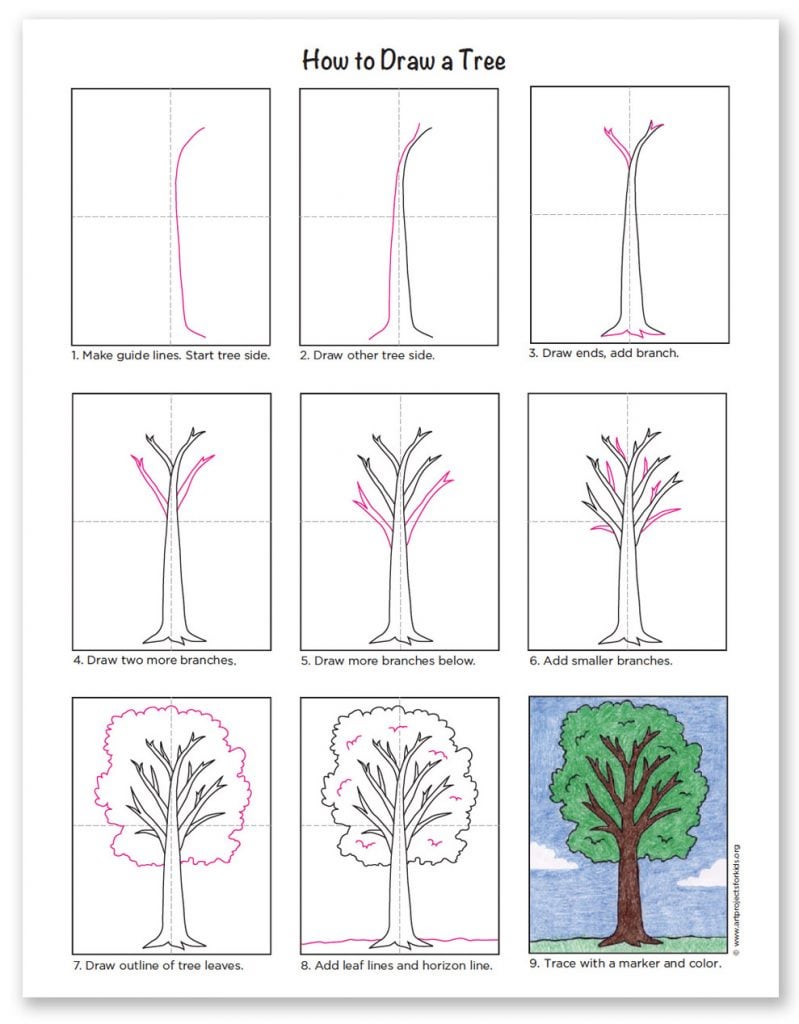
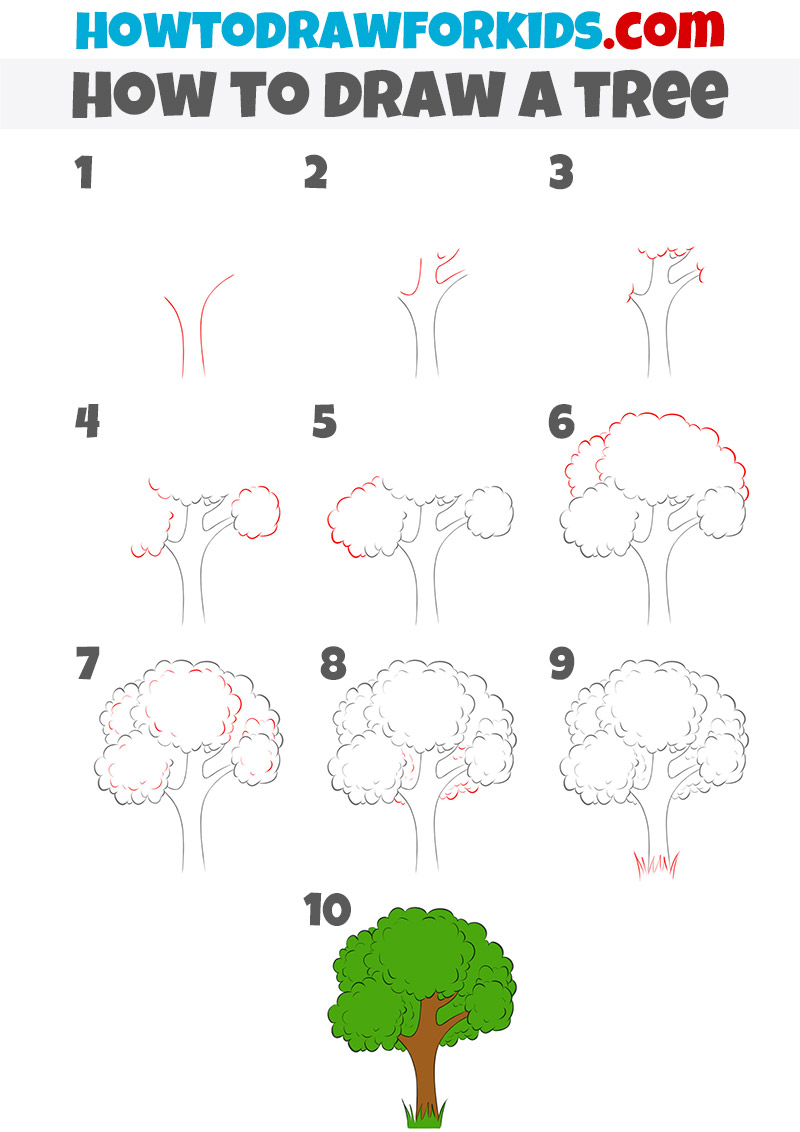
Step 1: Trunk Trouble
Pressed way too hard drawing the trunk like some telephone pole. Looked stupidly straight so I erased half and tried making it crooked. Still felt fake so I googled “real tree trunks” on my phone. Copied those wobbly lines near the bottom and added root bumps. Already broke the pencil tip twice.
Step 2: Branches Blues
Started drawing branches going straight up like a kid’s drawing. Looked at my neighbor’s oak tree and noticed branches grow sideways more than up. Redrew them angling down with thinner lines at the tips. Pro tip:
- Make top branches shorter
- Bottom ones longer and droopier
Step 3: Leaf Clusters
Tried drawing individual leaves first – total disaster! Switched to making cloud shapes instead. Scribbled light circles where I wanted leaves to bunch up. Almost quit when my eraser smudged everything, but then I realized messy circles look more natural anyway.
Step 4: Ugly Texture
The trunk looked naked so I added vertical lines. First attempt looked like prison bars. Scratched some wavy, broken lines instead – thicker at the bottom, thinner up top. For leaves, just poked random dots inside my scribble-clouds. Looked okay from three feet away!
Step 5: Shading Shambles
Grabbed a tissue to smudge pencil marks since I don’t own blending tools. Darkened the trunk’s left side because my window light comes from the right. Messed up and made the whole bottom too dark. Fixed it by erasing highlights – looked kinda 3D after that. Added grass squiggles to hide my eraser crumbs.
Final Disaster Check
Stepped back and realized my tree looks drunk leaning sideways. Too late to fix the tilt so I owned that crookedness. Threw it on the fridge next to my kid’s scribbles. Moral? Trees ain’t perfect and neither is drawing – just embrace the wobbles!


